
Instead of “How to Make Oopsie Bread” wanted to name this post “I don’t want to talk about it.”
The reason why I never wanted to know how to make Oopsie bread before is that I knew it would end up like this.
While I love cooking, I do NOT enjoy baking. When I saw the recipe for Oopsie bread, involving whipping egg whites and performing the chemistry experiment of making them “stiff,” I knew it wasn’t for me. I’ve never been great at meringue. I had no desire to BE great at meringue. I decided lettuce wraps were good for just about any purpose…right?
Well, when I embarked on my 30 low carb sandwiches project, I knew I would need to tend to the Oopsie breadmaking, no matter the cost. And so I did.
Round One
The first round was a bit of a disaster. The yolks ended up in the whites, and I decided that it probably wasn’t that big of a deal (it is) and I was also too optimistic about using a hand mixer.
About five minutes into beating up my whites, I wielded my iPhone in one hand to Google techniques on whipping the eggs until they were stiff. Should it take five minutes? How much longer would I be standing here? They were foamy, but not even close to stiff. I blame the hand mixer and bits of egg yolk. About fifteen minutes into it, my hand fell off and I conceded.
I took my droopy egg whites and mixed everything together anyway, but it was a hot sloppy mess, so I resorted to the muffin pans.
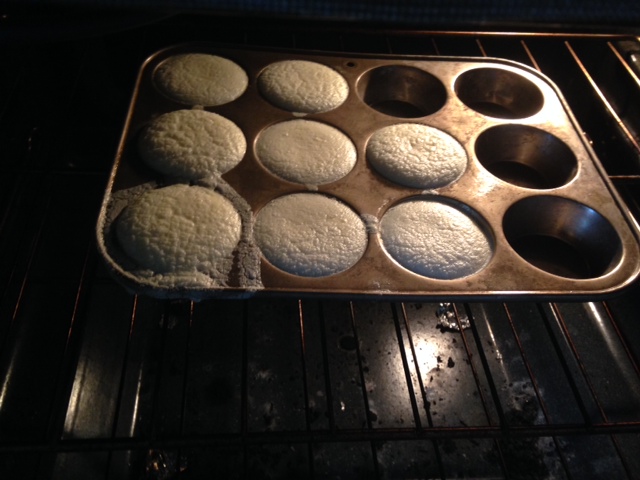
That could work, right?
NOPE.
They were delicious, but they were basically little egg and cheese muffins. No “bread” in sight.
Round Two
Knowing that I did just about everything wrong in the last batch, I decided to give it one more try. I used the stand-up mixer and I separated the yolks like a real professional!
After just a few minutes in the stand-up mixer, it was “stiff.”
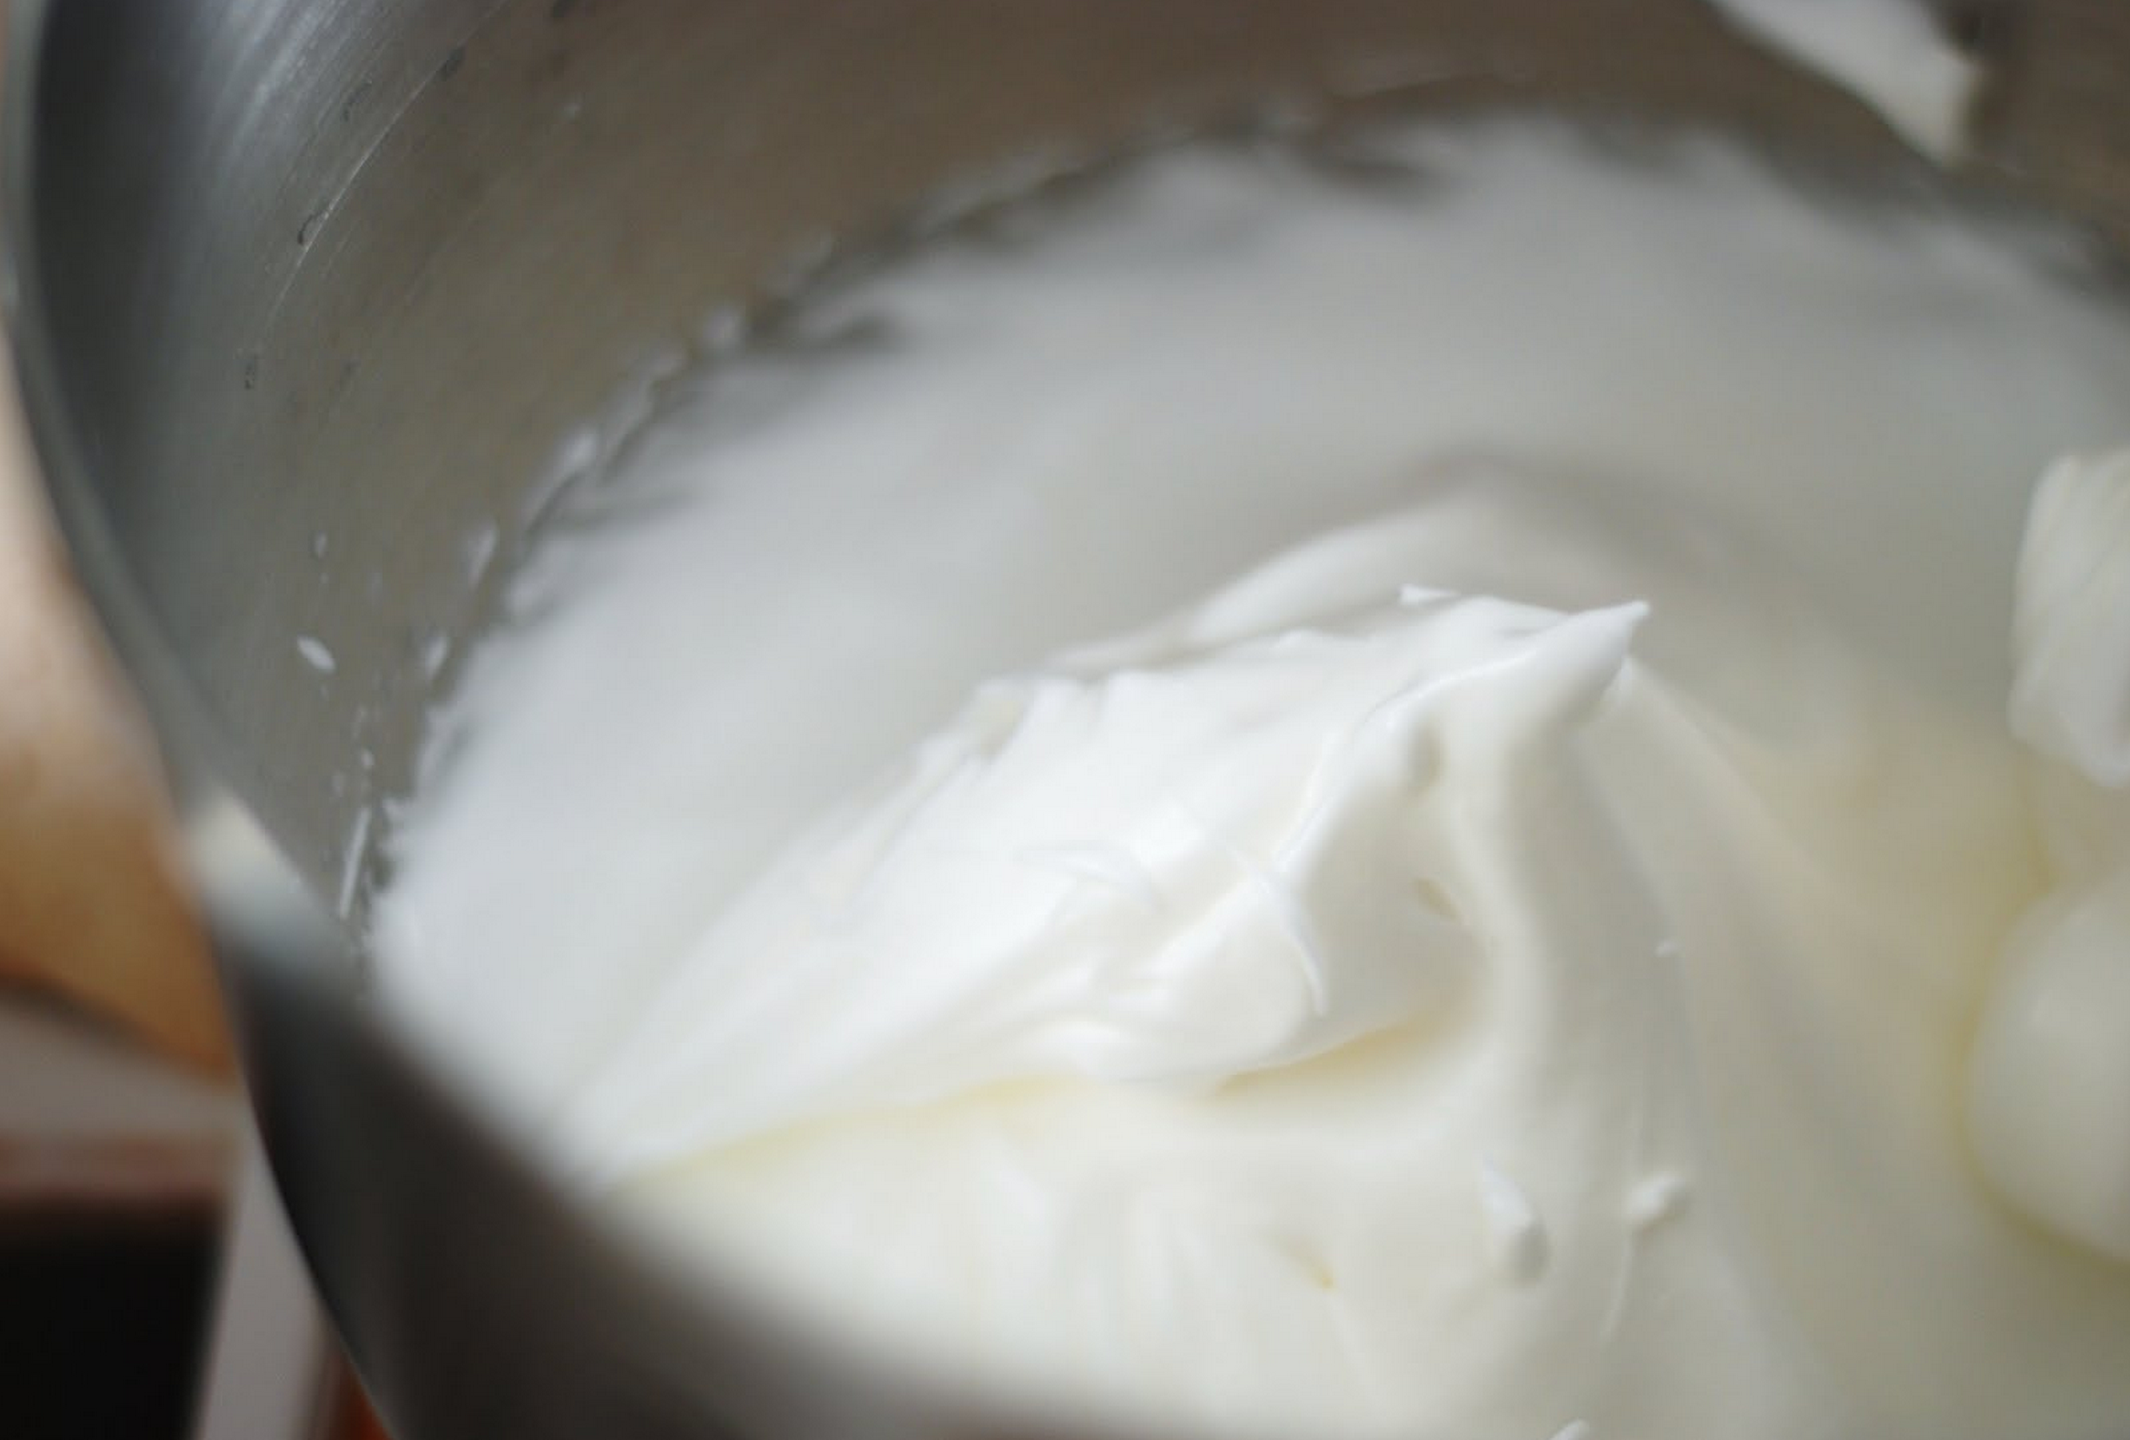
This is what “stiff” means. Via DizzyGirlBakes
While I was doing all this, in the span of about five minutes —which also involved mixing together the yolks and cream cheese with a hand mixer—I read that if you leave those “stiff” egg whites alone too long after mixing, they’ll separate and become unusable.
Panic set in.
I decided I WAS NOT DOING THIS AGAIN. So when the whites were “stiff,” I flung open the mixer, and all of the foam was stuck to the actual mixer, alllllll up inside of the whisk. I wrestled with the thing I’ve only used twice before and begged it to please just release the whisk so I could get the foam out, but getting it off felt like trying to fly the Tardis.
So there I was… thirty seconds on the clock with the threat of foam separating and starting over again.
Like some kind of girl scout, I drove my hands deep into the whisk, fetched out the giant glob of foam and plopped it into my bowl of mixed cream cheese and egg yolks. And not to waste any time, now that I was up to my elbows in foam, I ever so gently mixed the whole thing up with a few graceful swooshes of … my hand. Sanitary, I know.
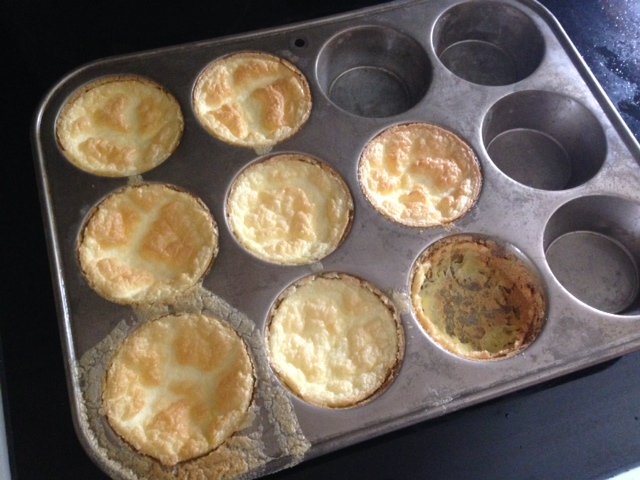
Next, I took handfuls of the new foam mixture and plopped them onto the baking pan, with no real strategy whatsoever. Why use a spoon now, right? From there, I threw it in the oven and set the timer for 20.
This is what they actually look like straight out of the bowl.
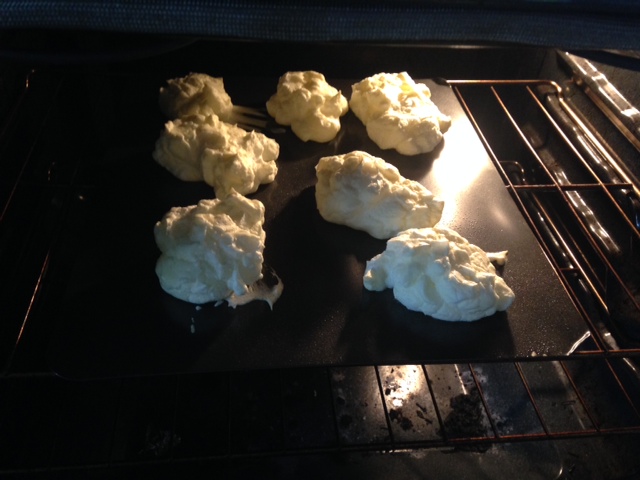
Done. Right?
Well, sort of. I turned around and discovered the white froth had frantically escaped my wrath and clung to cabinets, floors, dishwasher and my phone.
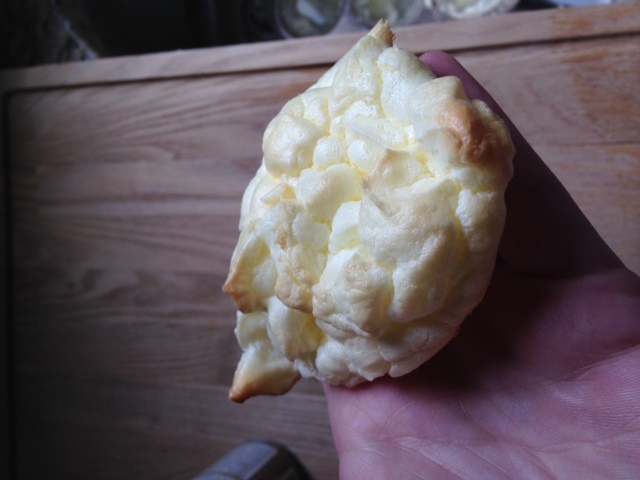
Thankfully, 20 minutes later, I had what I think was successful Oopsie bread. Or Oopsie rolls. Or whatever you call them. You can see evidence of my froth-throwing in that top one.
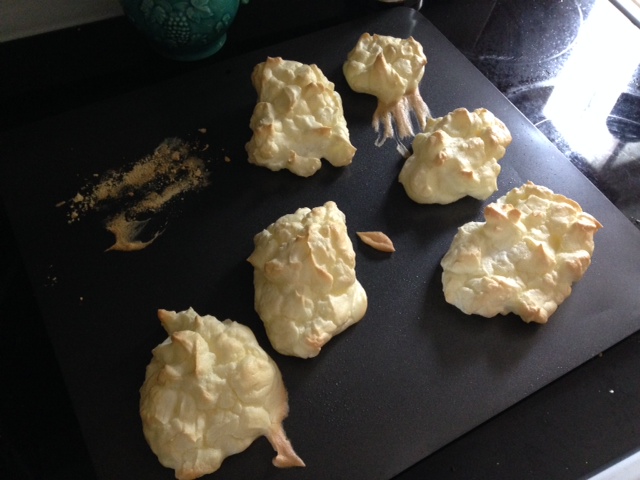
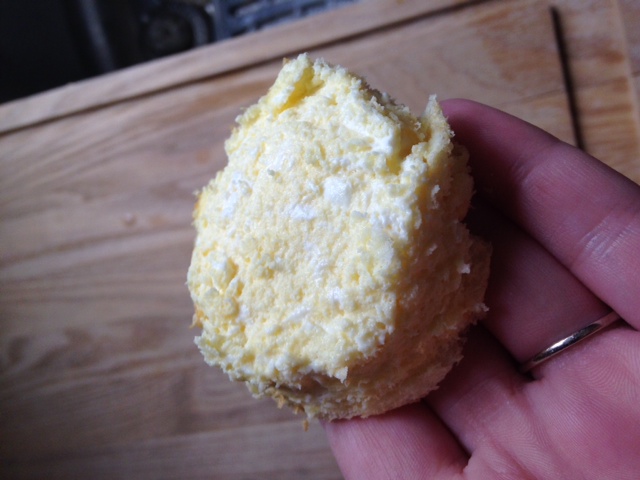
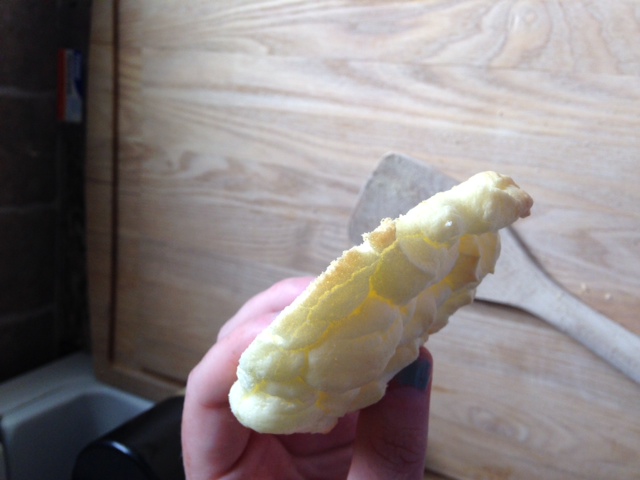
And they even stood up to holding (gently).
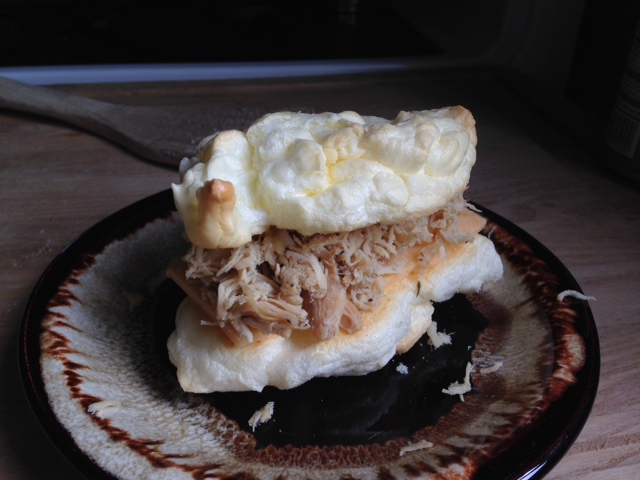
So I made a sandwich and called it a day.
To me, Oopsie bread isn’t nearly as rewarding as it should be for the effort involved. I’ll stick to my lettuce wraps! But if you decide to proceed here is the recipe, although it exists with a pack of Stevia and Splenda in other forms.
How to Make Oopsie Bread:
Servings: 6
Prep Time: 5 minutes | Cook Time: 20-25 minutes | Total Time: 25-30 minutes
Nutritional Facts: 1g Net Carbs| 85 Calories | 7g Fat | 1g Carbs | 4g Protein | 0g Fiber
Ingredients:
- 3 Eggs
- A pinch of Cream of Tartar
- 3 oz. Cream Cheese
Steps:
- Pre-heat the oven to 300 degrees.
- Separate the egg whites from the egg yolks.
- In a stand-up mixer (not a hand mixer!) blend together the egg whites and cream of tartar for 5 minutes on high until “stiff” – aka super frothy and can stand up like the peak of a mountain.
- Meanwhile, blend together the cream cheese and egg yolks with a hand blender until the lumps are gone (about a minute).
- Add the egg white mixture into the cream cheese mixture gently with a spoon or spatula and try not to bust up all your froth.
- Use a large spoon to scoop out your mixture onto a greased baking pan. You should be able to make approximately six.
- Cook on 300 degrees for 20-25 minutes.
- Enjoy?
How to Make Oopsie Bread: The Adventures of a Non-Baker Trying to Bake Oopsie Rolls

To me, Oopsie bread isn’t nearly as rewarding as it should be for the effort involved. I’ll stick to my lettuce wraps! But if you decide to proceed here is the recipe, although it exists with a pack of Stevia and Splenda in other forms.
- Prep Time: 5 minutes
- Cook Time: 20-25 minutes
- Total Time: 25-30 minutes
- Yield: 6 Servings 1x
- Category: Lunch
Ingredients
- 3 Eggs
- A pinch of Cream of Tartar
- 3 oz. Cream Cheese
Instructions
- Pre-heat the oven to 300 degrees.
- Separate the egg whites from the egg yolks.
- In a stand-up mixer (not a hand mixer!) blend together the egg whites and cream of tartar for 5 minutes on high until “stiff” – aka super frothy and can stand up like the peak of a mountain.
- Meanwhile, blend together the cream cheese and egg yolks with a hand blender until the lumps are gone (about a minute).
- Add the egg white mixture into the cream cheese mixture gently with a spoon or spatula and try not to bust up all your froth.
- Use a large spoon to scoop out your mixture onto a greased baking pan. You should be able to make approximately six.
- Cook on 300 degrees for 20-25 minutes.
- Enjoy?
Notes
Depending on the pesto you use, your macros could change. Use My Fitness Pal’s recipe calculator to get more accurate net carb totals
Nutrition
- Serving Size: 6
- Calories: 85
- Fat: 7g
- Carbohydrates: 1g
- Fiber: 0g
- Protein: 4g
22 comments
[…] Also, it was fresh and delicious and super easy to pack as a lunch! As always, choose the wrap or keto “bread” of your […]
[…] wrap of your choice – in my case today, one of those devil oopsie rolls. […]
[…] with a fruit that has one of the lowest sugar counts, and my most loathed but keto-famous recipe: Oopsie bread. Oh, and some organic, naturally low sugar peanut […]
I use muffin top pans to bake my ‘oopsie’ bread/rolls. Since I only have a tiny convection oven, I had to let some of it sit while the rest of it baked. They turned out OK, and the pans make them turn out much better.
Nissa from http://annakindt.wordpress.com
I am NOT a cook OR baker, but doing keto one has to at least TRY to fix meals … I tackled oopsies early on and amazingly got it down pretty quickly. I make savory oopsies, sweet oopsies, sammie oopsies, french toast oopsies, etc. I add some vanilla whey protein to the egg yolk/cream cheese mix which gives it some substance. When you put them on the cookie sheet, you can ‘shape’ them more like hamburger buns which makes them easier to use. I can whip up a batch in under five minutes now. I also do a whole ‘sheet’ of them, spreading the entire mix onto the cookie sheet instead of dropping ‘buns’, then cutting them later. I use them for various ‘roll-ups’. Makes great oopsie twinkies! Oopsies are SO worth the effort! 😀
jealous
You are quite the trooper. I would have given up after the first try as frothing and cream of tarter frighten me. I, also, am not a baker. Have you tried Carbquik?
A-M-AYYYY-ZING.
have you tried ‘alison bread’? I’m a fan because it takes less than 5 minutes to make and is super simple, in the microwave, no less… https://ketoincognito.wordpress.com/2014/04/15/and-alison-said-let-there-be-bread-and-then-there-was-bread-and-it-was-good/
[…] My first foray into oopsie rolls started and almost ended here. Fortunately, the lemon pepper pulled chicken was one of my favorite new recipes and it made me (almost) forget about oopsie hell. […]
[…] week I’ve been experimenting with new ideas as well. First off, you saw how my foray into oopsie bread went and I’m not going back to […]
hahahahahhahaha 😀 you are so funny! I mean your writing is so good and the whole “I don’t wanna talk about it!” I am sorry I am not laughing at you, but totally with you.
I could have written this blogpost myself. I have attempted these numerous times and no matter what …even if they “look” pretty…even if they look done on the outside, that nice beautiful golden color…they always have a sensation of too soft compared to the outside or not cooked enough on the inside. Even lowering the heat slightly and letting them to cook longer (so the inside has more time to cook on a lower heat) I never seem to have the turn out everyone else does! At least I know see other people have had challenges with this bread!
Best wishes and a Happy Healthy New Year! 🙂
By far, the funniest recipe I’ve ever read….lol.
Hi… I got a kick out of your blog post! I laughed and laughed…. however! ….i had all sorts of issues making Oopsie bread, too! And since I have decided to use Atkins diet plan, and change my way of eating, I fought the good fight, and finally came up with an Oopsie bread recipe of my own – which works well for me! NO separating of eggs! NO egg white, foamy disaster! I simply dump everything together into my Ninja blender, whip the heck out of the batter, and pour directly into a 12″ round, parchment paper lined pizza pan. What a difference! After it’s finished, i allow it to cool and cut it into 8 wedges. Voila! I have triangular bread.
If you’re interested in trying my recipe, i think you’ll be pleased. It does not taste very eggy after it cools. Here is what i do:
Combine 4 whole eggs, 2-3 ounces of softened cream cheese, about 1/2 cup of grated mozerella or cheddar cheese, 1 tsp of baking powder into food processor or high powered blender (or use a bowl and mixer). Beat for a couple of minutes, until mixture is smooth. Pour into your pizza pan and bake at 400 for about 15 minutes (watch it, all ovens are different, as we know!).
You can also opt to double the recipe and use a large, parchment lined cookie sheet. This way, the Oopsie bread can be cut into squares, instead of wedges (but i don’t mind the wedges). This bread can be stored in the refrigerator for over a week. I recommend storing it in a slightly opened ziplock bag or container.
I have substituted the 1/2 cup of mozerella with a few tablespoons of butter or real mayonnaise a couple times, and this works out well too. The bread doesn’t puff up like the Oopsie rolls. Even so, it’s nice and dense. Any herbs can be added to this recipe for a bit of a kick. It also makes a pretty good, low carb pizza.
I’m lazy, and this recipe is for me! I can now have sandwiches for the first time in ages!
I’ll have to keep this stuff in mind. I planning on having a get together in a few months. I have no idea about how to cook something that tastes delicious. However, I think that this stuff is something that I can really do. After all, it doesn’t seem too difficult. http://www.klostermanbakery.com/service/
CarolynnOHMcDade How does it taste? And how many carbs do you think it is?
I am probably blind but I didn’t see the carb count on this? I appreciate all the post. I have a son has to live a low carb life. His body does not process carbs so he basically shuts down if it overwhelmed. So finding a good site and someone as dedicated to a low carb life and having fun with it, is wonderful. I can not wait to share some of these recipes with him, as he just turned 14 so some fun with food will be a high light! Thanks so very much! Keep sharing!!
How many calories does each oopsie have?
Of my gosh! As someone who has no talent for cooking this totally cracked me up out loud. I could just see myself reacting in the very same manor you did for every moment. Thank you so much. I will not be giving this a try at all. 🙂
Congratulations on the successful batch.
Some thoughts on egg whites. First, if looking for those stiff peaks it is super important to know 7 things..1. Fat and plastic are the enemy of eggwhites (at least in the whipping stages). Make sure all of your mixing equip is scrupulously cleaned first. Glass or metal bowls only. 2. If you need to mix up the yolks and whites in seperately batches and have only 1 set of equip, do the whites first. (Remember egg yolks =fat=enemy) 3. The fresher your eggs, the easier your seperation efforts will be. 4. Mixing too long can cause your whites to become unstable, so watch them and stop the mixer when desired results have been reached. 5. Yes, if you wait too long whites can seperately again, especially in humidity, but it’s not immediate. You should have plenty of time to move your whites to elsewhere and work your second mixture with ease. 6. When it’s time to mix your two batters together, folding is your friend. A lot of folks recommend doing it in 3 stages. This means adding 1/3 of your yolk mix into the whites, mix very gently, then the next, then the last. 7. If you need a little extra security, you can add a touch of cream of tarter. Though not strictly necessary for this recipe it’s worth looking into for things like meringue or pavlova.
Finally, Alton Brown did Good Eats episodes that were
excellent reference on working with whites, I highly recommend. I think “egg files 5” is the one you want. If you can find the right one, you’ll wonder how it ever seemed so impossible.
ChristinaWebster Thanks Christina, great tips!
CarolynnOHMcDade Thanks so much for the alternative!
Note that apparently the composition of the bowl makes a big difference with egg whites. Copper bowls are optimal, but according to Cook’s Illustrated, stainless steel bowls work well enough (apparently metal ions from the bowl have a stabilizing effect on the whites) and are much cheaper. It’s been my experience that stand mixers come with stainless steel bowls, but I don’t see any reason why a hand mixer and a stainless steel bowl wouldn’t work. BTW, I’ve successfully gotten stiff peaks whisking by hand, so it can be done; it does wear out the arm though.
Comments are closed.